Under Construction – West Seattle

What started as a 80’s tall & skinny box in West Seattle, looking like this…

Before

…is still in construction and already looks amazing.

In progress...

Yes, that is the same view in both photos. The old front didn’t look like a front. The doors you see in the before photo were not even the front doors (the front door was around the side of the house – confusing for visitors!).

In the re-design, the house now has a facade with eye-catching curb appeal. The seldom-used 3rd floor deck has been enclosed and is sure to become a favorite hangout spot. The view is amazing, and the new indoor space is flooded with light even on a rainy day, thanks to an oversized skylight.

DLH, Inc. www.dlhinc.com is the builder for this project, and their team is doing a fabulous job.

Magnolia Bluff – Before & After

Master Bathroom - Before

Master Bathroom - After

Guest Bathroom - Before

Guest Bathroom - After

Design challenge-

Update the 1920’s bathroom decor to compliment the home’s Spanish Colonial style.

Solution-

Modern conveniences merge with Mediterranean sensibility, creating a sense of warmth and luxury.

Frelo – Before & After

Before

After

The Beginning

Some homes are ideal candidates for tear-down or whole house renovations. This home had a significant amount of maintenance due, in addition to primary spaces in need of updating (kitchen and bathrooms).

The Big Idea

Originally, the homeowners planned only to remodel the kitchen and bathroom and replace the furnace and roof.

One of my initial design concepts explored the possibility of opening the kitchen to the family room (by removing a large fireplace and re-orienting the kitchen work areas toward the view).  This completely changed the feel of the house, and the owners’ feelings about the house.

Inspired to transform this house into their dream live/work environment, the project became a “near” tear-down (one wall and the slab-on-grade remained). An entirely new, modern, energy-efficient home now stands in its place.

Home Sweet Home-Office

One of the criteria for combining home with work was to create an acoustically separate area where the sounds of home-life would not distract from work. The door to this space is fitted with an acoustic door bottom and perimter gasket by Pemko.  The office walls are double-framed with offset studs in a “floating” installation.

Acoustic home office door

Winter Cheer (and eco-mindfulness)

Emphasis was placed on high quality systems, including radiant hydronic heat, commercial grade metal roofing, and rainscreen cladding. The southern exposure boasts large windows, both to capture all the mood-lifting sun possible during the rainy Seattle winter and to allow passive heating of the hydronic tubing in the floor.

Queen Anne 1 – Before & After

Kitchen Challenge: Design a comfortable kitchen for a family of five within an existing narrow maze of circulation.

Kitchen Solution: A functional arrangement of appliances and ample workspace – all found within the existing walls – by simply eliminating one door.

Kitchen, before

Kitchen, after

Dining Room Challenge: Revive the original charm and warmth of this historic Craftsman interior.

Dining Room Solution: The paint was stripped from the original millwork, and the perfect period-appropriate paint color was chosen for the plaster.

Dining Room, before

Dining Room, after


Why Architects Hate Curtains

While researching turn-of-the-century decorating, I came across a chapter on windows in Edith Wharton’s “The Decoration of Houses” that finally put into words what I wished to be able to explain so well. Edith, who became known as an accomplished novelist, began her writing career with this treatise, co-authored with Ogden Codman in 1897. Interestingly, although this book became a manual for interior designers, her position is in support of architecture-as-ornament rather than decoration-as-improvement.

As a normal part of my professional service as a residential architect, I help select everything from doors and windows to tile and carpet.  To me, these items are part of the architecture of the building.   They are as much a part of how the room feels and functions as its size, volume, and orientation.

I do not, however, “do” curtains.  Those, along with movable furnishings, I consider to be the domain of an interior designer, and I limit myself as an advisor to the homeowner and/or their interior designer as to the “jobs” those items have in complementing the architectural style while fulfilling their desired function.

It is true, though, that most architects hate curtains.  Well, certain kinds for certain reasons… and, Edith explains it well:

The “Job” of Windows

  1. …”light-giving is the main purpose for which windows are made…ventilation, the secondary purpose…”
  2. Windows should not be so wide that they are not opened easily.
  3. The height of the window sill should consider both the view, the need for privacy, and whether or not there is a desire to have a piece of furniture, such as a window seat, in front of the window.  Lower sills offer more view, while sills placed at 3′ above the floor afford more privacy from “persons approaching the house”.
  4. Although the sill heights may vary “for practical reasons…the tops of all the windows should be on a level.”
  5. “…the old window with subdivided panes had certain artistic and practical merits…serv[ing] to establish a relation between the inside of the house and the landscape…”

The Purpose of Curtains

  1. “The real purpose of the window-curtain is to regulate the amount of light admitted to the room, and a curtain so arranged that it cannot be drawn backward and forward at will is but a meaningless accessory.”
    blinds down

    These curtains are on rings that slide easily to provide maximum privacy and block window drafts.
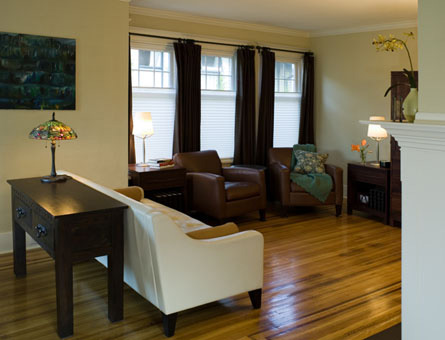
    blinds up

    Bottom-up blinds are easy to operate and add privacy while filtering light.

  2. “The better the house, the less need there was for curtains.”
  3. “…the curtain…was regarded as a necessary evil rather than as part of the general scheme of decoration.  The meagerness and simplicity of the curtains in old pictures prove that they were used merely as window shades or sun-blinds.”  (note:  This book was written in 1897 and refers to artistic representations of feudal architecture, such as paintings.)
  4. “Fixed window-draperies, with festoons and folds so arranged that they cannot be lowered or raised, are an invention of the modern upholsterer.   …they have made architects and decorators careless in their treatment of openings.”

Edith’s Preferred Choice, circa 1897

“The solid inside shutter…formerly served the purposes for which curtains and shades are used, and combined with outside blinds, afforded all the protection that a window really requires.  These shutters should be made with solid panels, not with slats, their purpose being to darken the room and keep out hte cold, while the light is regulated by the outside blinds.  The best of these is the old-fashioned hand-made blind, with wide fixed slats, wtill to be seen on old New England houses and always used in France and Italy:  the frail machine-made substitute now in general use has nothing to recommend it.”

paris shutters

Shutters in Paris

In Summary

“…the beauty of a room depends chiefly on its openings, to conceal these under draperies is to hide the key of the whole decorative scheme. …The more architecturally a window is treated, the less it need be dressed up in ruffles.”

Wood Flooring – Decision Factors

What are the main decision factors when choosing between pre-finished wood flooring, engineered wood flooring, and solid wood flooring that is finished in place?

Appearance

Microbevels

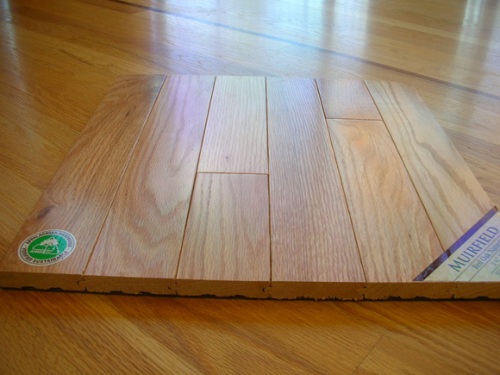
  • Pre-finished wood flooring typically has microbevels, which are little v-shaped notches between the planks. Some homeowners think that is attractive and desirable – accentuating the length of a room or creating the illusion of a different proportion. Others think that the grooves would look too “busy” and be a nuisance to clean.
  • Engineered wood flooring may or may not have microbevels, depending on the brand, style, etc.
microbevel

Pre-finished solid oak flooring with microbevels displayed on top of a field-finished oak floor without microbevels.

    Visual Authenticity

    • Some brands of engineered wood flooring use one wide plank of flooring to simulate several narrower planks. What is referred to as a “1-strip piece” will be a single plank that is a single strip.  A “2-strip piece” will be a single plank made to look like two strips, etc.  If the product has microbevels, this is very noticeable.  If it is smooth, the seams are still visible, but less noticeable.

    Transitions

    • If you are putting new wood flooring next to existing wood flooring, the thickness of the materials may differ, especially between engineered and older wood flooring. If you do not want to have a height difference between two areas, you will either have to have a transition (such as a stained door sill) or build up the subfloor underneath the new flooring to match the height. If your primary motivation was saving money, this added expense should be factored into your decision.

    Maintenance

    • Pre-finished has an aluminum oxide finish that cannot be site-finished and does not have a real “clear finish” due to the aluminum suspended in the finish.  If you have large pets with claws, lots of animals, heavy traffic, routinely wear shoes in the house, or are generally hard on your floor, this should not be your first choice.
    • Engineered allows you to sand and refinish the floor, but how many times depends on the thickness of the wear layer.  Look for the thickest wear layer available.  There are companies that have wear layers nearly as thick as solid wood flooring.  Owens has a line with a 5mm (approx. 3/16″) wear layer.  For comparison, 3/4″ solid flooring has a 5/16″ wear layer above the tongue and groove.  This is the amount that is sandable, however you cannot sand all the way down to the tongue and groove without splintering and exposing nails.  So, in reality, a 3/4″ solid product has about a 6mm (1/4″) wear layer which is just about equal to the Owens 5mm wear layer (which can be sanded until there is no wear layer left).


    OAK-WEAR-LAYER

    Wear layer of solid unfinished oak vs. engineered unfinished oak


      Installation Options

      Field-finished

      • usually nailed in place, concealed within the tongue and groove joint

      Pre-finished or Engineered

      • nail-down,
      • glue-down, or
      • “floating” (boards are separated from the subfloor by a sheet material and not physically attached to the subfloor)

      Advantages

      Pre-finished

      • less mess and smell during installation
      • faster start-to-finish install time
      • may be less expensive than field-finished, depending on species, width, and type of installation

      Engineered

      • more expensive and/or exotic species without a significant price increase
      • some brands/lines are suitable for installation over radiant floors (check www.kahrs.com for options)

      Field-finished

      • more predictable longevity (and therefore less likely to end up in a landfill)
      • is able to be refinished many times, with certainty
      • more familiar to floor refinishers (been around forever)
      • unlimited choice of stain colors, which can be swatched on the flooring after it is installed
      • your choice of finish (type, sheen, brand, number of coats)
      • best for period-appropriate installations (top-nailed, inlays, etc.)

      To learn more…

      I recommend Jeff Lane of Lane Hardwood Floors, one of the most talented and knowledgable hardwood flooring vendors and installers here in Seattle.

        Relocating a Japanese Temple

        IMG_4096

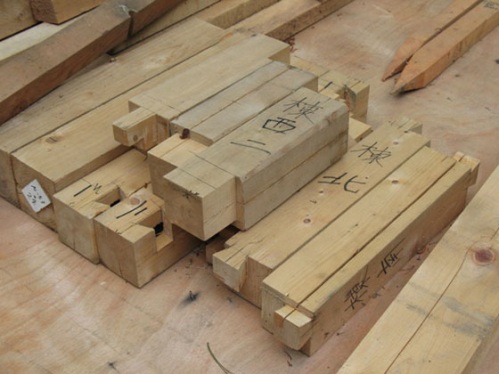
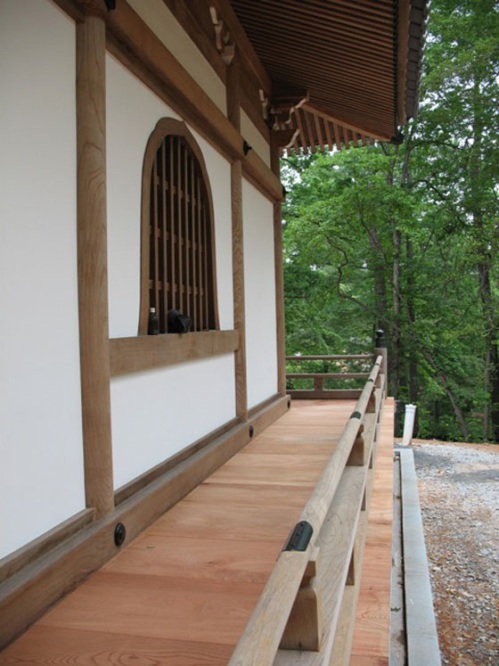
        Dr. David Shaner, chairman of the philosophy department at Furman University in Greenville, South Carolina (and also a friend), was entrusted in 2004 with the relocation of the Tsuzuki family’s private Buddhist temple from Japan to the Furman campus.  This is the first known relocation of a temple from Japan to the United States, and it was an incredible undertaking with a strict deadline of completed demolition.  Years of energy and talent were required to raise funds, dismantle, transport, and rebuild the temple – including 13 Japanese craftsmen.

        Read more:

        Associated Content, “Palace of Peace Buddhist Temple and Asian Gardens Dedication,” Sept. 18, 2008.

        Lubbock Online, “Buddhist temple becomes part of university campus, ” Nov. 8, 2008.

        Reconstruction is now complete.  These photos, taken during construction, are part of a collection posted here.

        IMG_3730

        IMG_4080

        IMG_4087

        IMG_4171

        The Client’s Time Investment

        Once our working relationship is established (see Getting the Project Started), the real fun begins.

        “How long will the design process take?”

        As a rule of thumb, the design process takes approximately the same amount of time as building the project. In other words, a project that requires 6 months to build requires 6 months to design. This does not necessarily include permitting (which depends on many variables).

        “How much time will you need me during design?”

        Meetings

        We will need to meet to review design drawings, preferably in person.  This is especially important for the first design meeting and for major design milestones. These meetings are usually 1-1.5 hours long.

        Most clients find it helpful to meet at their home, so that we have a visual reference of size, configuration, etc. of the spaces being considered. Sometimes it is easier to meet at your place of work, or at a nearby restaurant or coffee shop, especially if the project is a new home or is located far away from your workplace.

        Homework

        You will have homework, including private discussions about the drawings and ideas.  You may find it helpful to continue to look for inspiration photos to illustrate thoughts you have as the design develops, and you will want to spend time researching fixtures and appliances.

        Showroom Visits

        Together, we will typically visit a plumbing showroom and lighting showroom.  These visits are usually 1.5-3 hours long.

        We may also visit tile and flooring showrooms.  This is something that may be delegated to one lead “decision-maker”, and we may follow up (either separately or together) at additional tile showrooms.   Ultimately, we will meet at your home to mix-and-match samples and narrow choices.  The first tile showroom visit can be 1.5-3 hours, depending on the project. Subsequent visits and meetings vary with each project but are usually significantly shorter.

        Tally

        Many of my clients have said that they dedicated 3-4 hours per week to their project (some weeks more and some less, averaging 3-4 hours per week overall).  Your decision-making abilities, both individually and jointly, are the biggest factor affecting the time investment required.

        Getting the Project Started

        “We want to move forward.  What next?”

        Now that we know we’re on the same page (see How to Prepare for the Architect-Client Interview), we build the foundation for a successful project, beginning with:

        • Contract and retainer – When the budget, objectives, timeline, and chemistry are all in place, the next step is signing a contract. A retainer is required with your signed contract, which is applied to your final invoice. The retainer is typically 10% of the estimated fee.
        • Follow-up meeting – This is an opportunity to continue the discussion about design we began during the interview. You may be able to fill in a few blanks that you hadn’t been able to earlier, or you may have additional questions, ideas, or inspiration images to discuss.
        • Measure and draw existing – To get started on a remodel or addition project, I first need to document what is there. This may be limited to relevant areas or include the entire house, depending on the scope of your project. Most Seattle homes that are “typical urban lot” size take two people 3.5-4.5 hours to measure, which includes significant architectural features (walls, doors, windows, etc.), but does not include mechanical or electrical systems and fixtures, or items which would require destructive demolition. Note: We need to open closets, cabinets, etc. to measure how deep they are and will also take photographs.  Access to the attic(s) and crawlspace(s) should be cleared and ladders provided, if needed.

        How to Prepare for the Architect-Client Interview

        The first meeting is an opportunity for us both to interview each other.  It is very important that everyone that will be involved in the design process be together at the interview so that we all get the chance to ask questions and get a sense for what it would be like to work together.

        “What do you need from us?”

        1) Brief written description of your goals for the project, including:

        • list of “must-have” items, “would be nice to have” items, and “don’t want” items (Note: If all of the people living in the house don’t agree about the goals, it is helpful to know what differs.)
        • budget for the construction cost of the project (for more insight into costs, see “How Much Will my Project Cost?”).
        • timeline for the project (when you will be ready to start design, begin construction, and move in)

        2) Inspiration photos from magazines, books, vacations, etc.  (Note: It is not necessary that these photos be “the answer” to your goals, so don’t exhaust yourself trying to find that!  It is more helpful that you find photos of things you like, even if the photos represent a variety of architectural styles.  A photo of a “cozy corner” may look different for you than it would for someone else, so photos really help me tune into your own personal taste and learn what those words mean to you visually and experientially. Even photos of something you really DON’T like can be helpful for comparison.)

        3) Information that you may have about the house and/or lot, such as:

        • old blueprints – whether original or from previous remodels
        • survey
        • “Improvement Location Certificate” – Sometimes found in your mortgage documents, this is a drawing that shows the outline of your house, garage, etc. (the “improvements”), with dimensions of the structures and of the lot itself.  Sometimes, easement information and encroachments may be included in this document.  If you do not find a one in your file, you may want to check with your title company to see if there was one obtained on your behalf.  I have found that the drawing does not always make its way into your loan document package.)
        • copy of previous appraisal
        • if you’re changing the exterior appearance of the house, it is helpful to know if you anticipate problems with your neighbors
        • neighborhood covenants, if any

        4) “Walk and Talk”  – One of my favorite things to do is to be guided around a house by potential clients, listening to what they do and don’t like about their homes.  It is fun to learn what they wish for, what they’ve already changed, and how they see themselves living there.


        Enter your email address to subscribe to this blog and receive notifications of new posts by email.

        Join 6 other subscribers